
How to Save a Print-Ready PDF File from InDesign
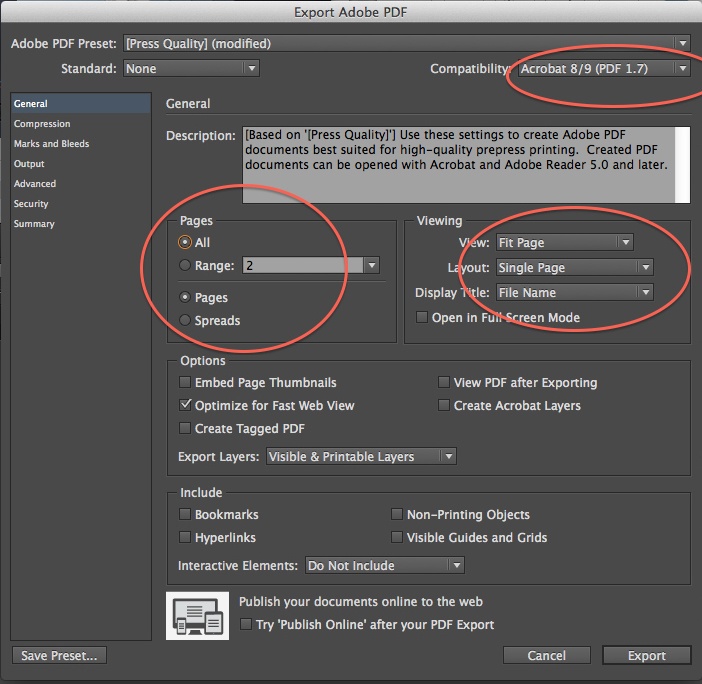
First, under File - Adobe PDF Presets, use the existing preset "Press Quality". Change the Compatibility to "Acrobat 8/9 (PDF 1.7)".
Then make sure you are saving all the Pages as “Pages” and not "Spreads". Then View as “Fit Page” and Layout as “Single Page”.
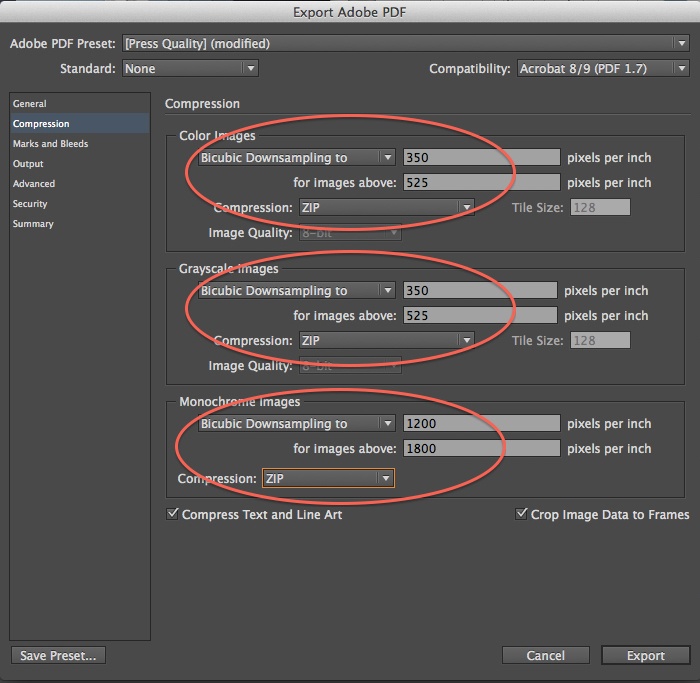
Next, in the Compression tab, we need to set the pixels per inch to "350" for Color Images and "350" for Grayscale Images. Change the Compression type to “ZIP” in all three.
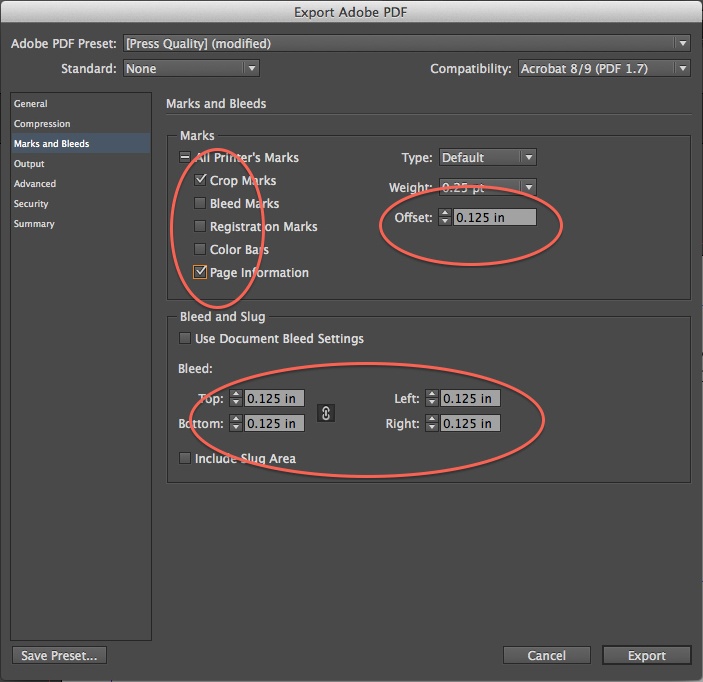
In the Marks and Bleeds tab, check the boxes named “Crop Marks” and “Page Information”. Make sure the Offset is set to "0.125” and in Bleed and Slug, make your bleeds "0.125” in all 4 places.
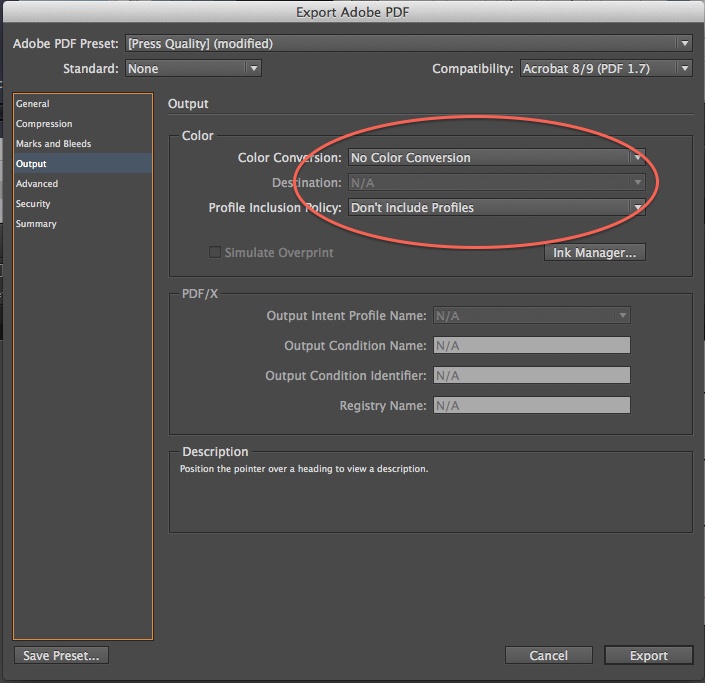
In the Output tab, change to “No Color Conversion” and “Don’t Include Profiles” The remaining tabs are set correctly. Now you can hit the Export button and save your PDF.
Congratulations! You're now ready to submit your PDF to Crown Connect for printing.
If you have any trouble or questions please be sure to call your Customer Service Representative at Crown Connect at 909.888.7531.