When you're preparing to submit PDF files to press, it is important to output using the correct settings. To assist with this, here are instructions on how to output a PDF from Publisher. Please note that Publisher is not recommended for quality print production.
1. Download Acrobat Reader
If your computer does not have Acrobat or Acrobat Reader, you probably do not have the print driver to generate a PDF from Publisher. You can download Acrobat Reader here.
2. Run Design Checker
After confirming that all looks well on your document, it is a good idea to check your work using Publisher's preflight mechanism. Under the File menu, select the Info submenu and click Run Design Checker. The checker will help you identify problems later on.
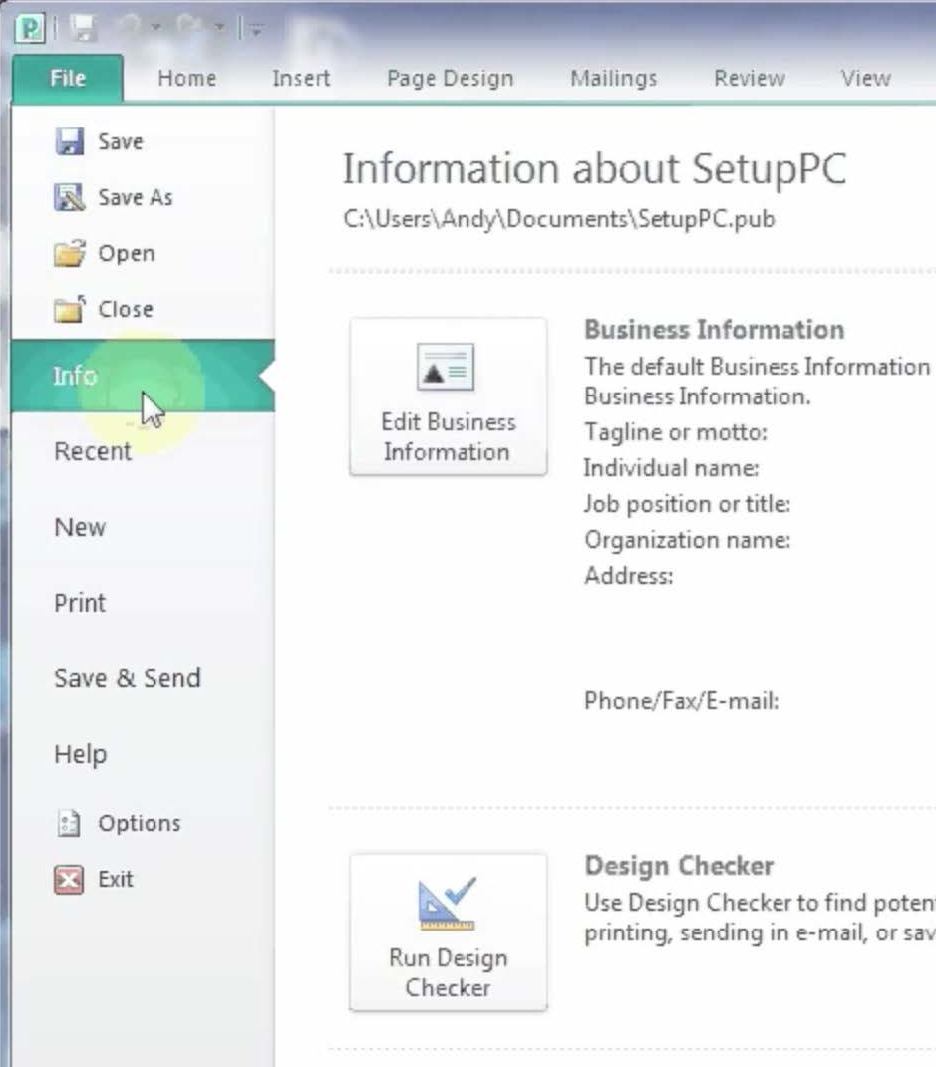
3. Check the Color Scheme
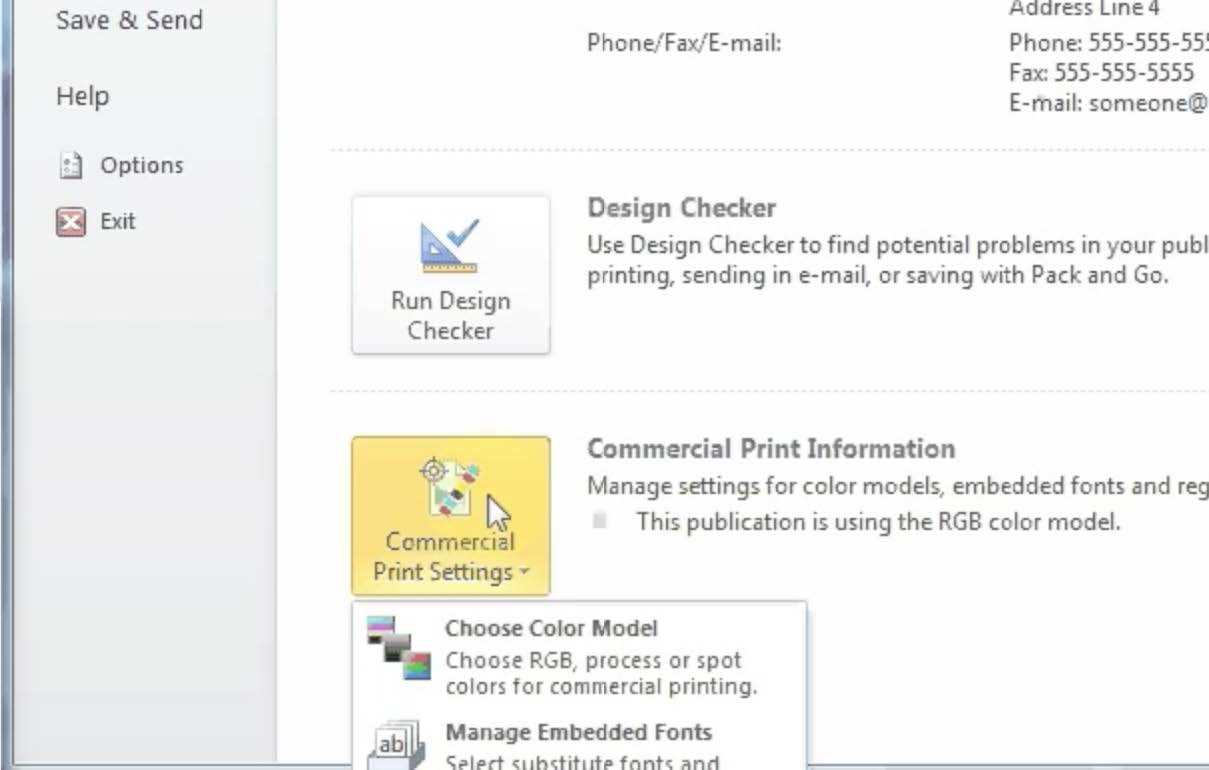
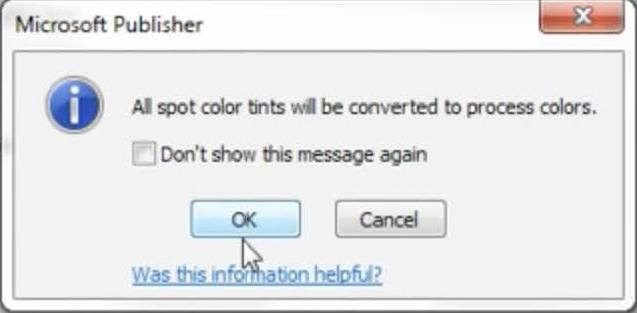
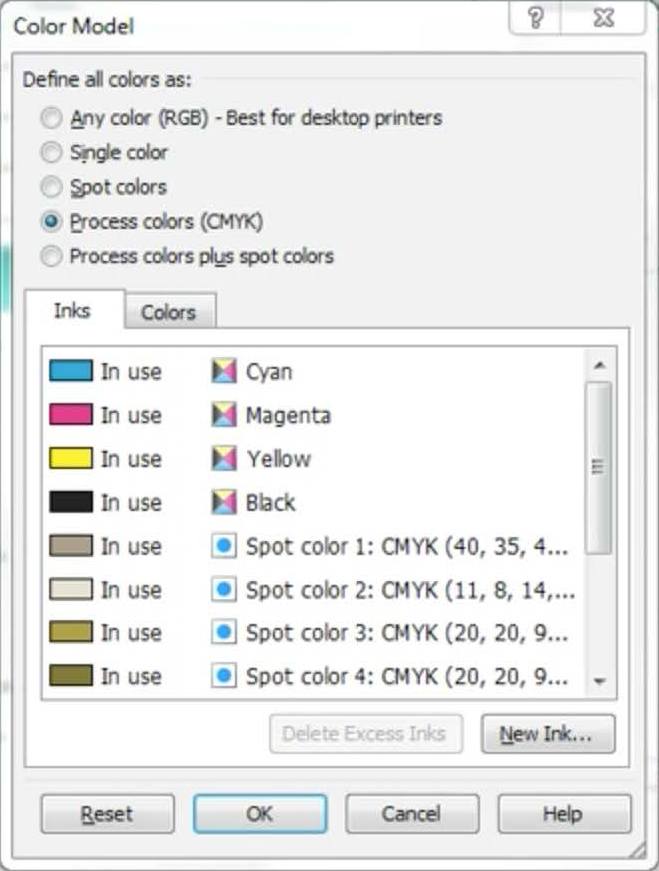
From the File menu, select the Info submenu. Click Commercial Print Settings and then click Choose Color Model. If the option isn’t available, skip to step 4. The Color Model window shows which colors are present in the work. Choose the scheme by clicking Process Colors (CMYK). Then click OK. Also, click OK if Publisher prompts you regarding color conversion.
4. Embed Fonts
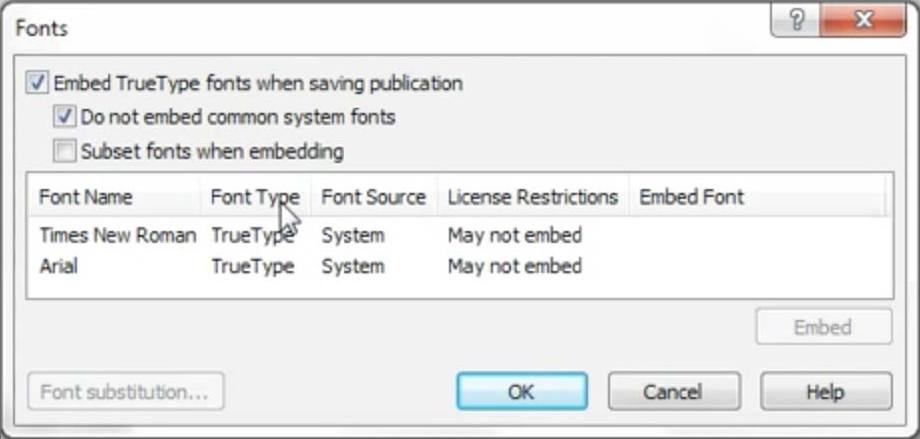
The fonts you've used in your artwork may not be available or may be a different variation at the printer. To ensure that your text appears as you see it, embed your fonts into the PDF. From the File menu, select the Info submenu. Click Commercial Print Settings (if available) and then click Manage Embedded Fonts. Make sure Embed TrueType fonts when saving publication is checked, then click OK.
5. Initiate PDF Output
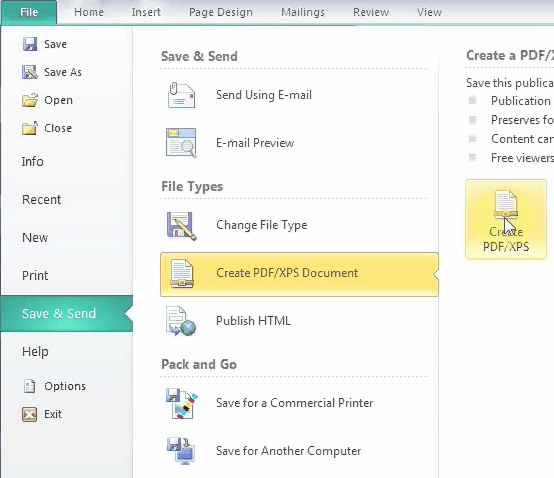
Once all preparations are done, you can output your PDF. From the File menu, select the Save & Send (or Export) submenu. Click Create PDF/XPS Document and then click Create PDF/XPS.
6. Select Output Settings
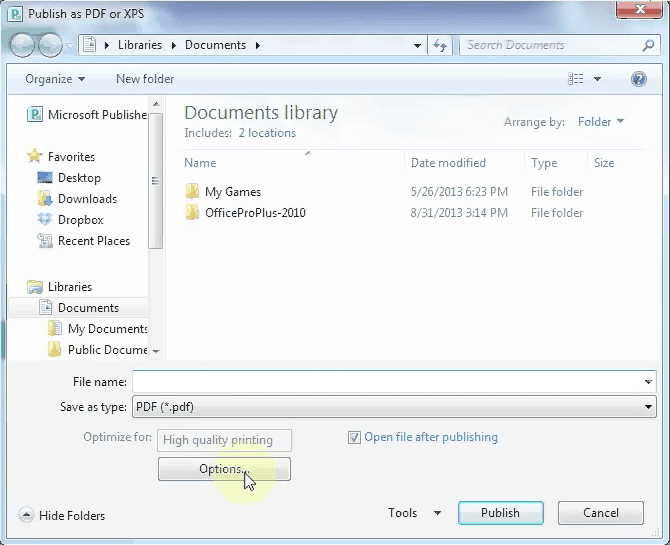
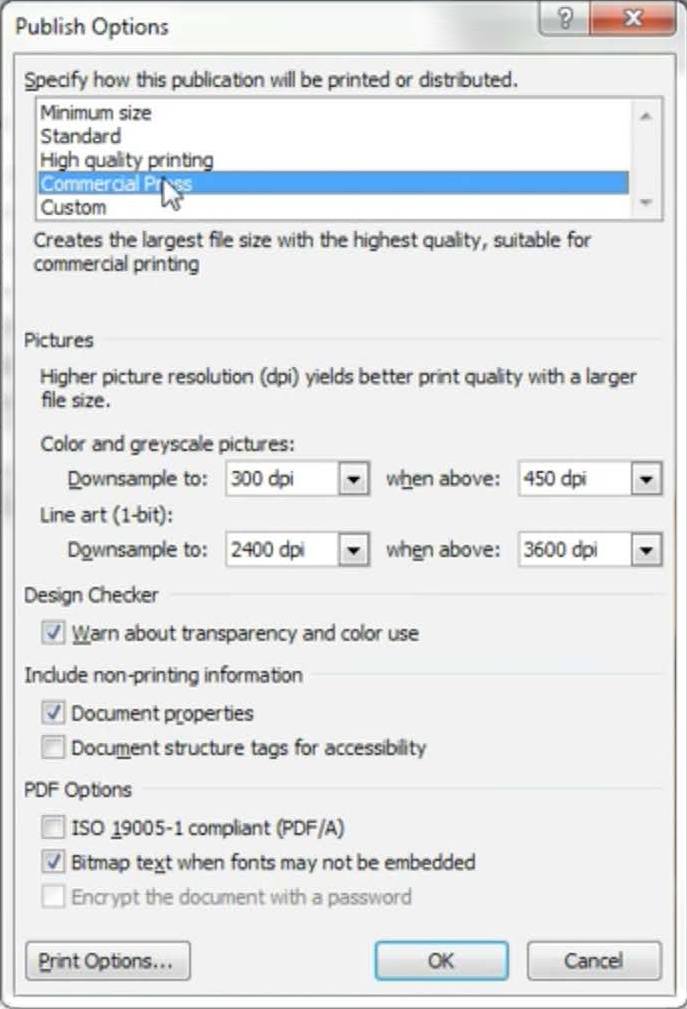
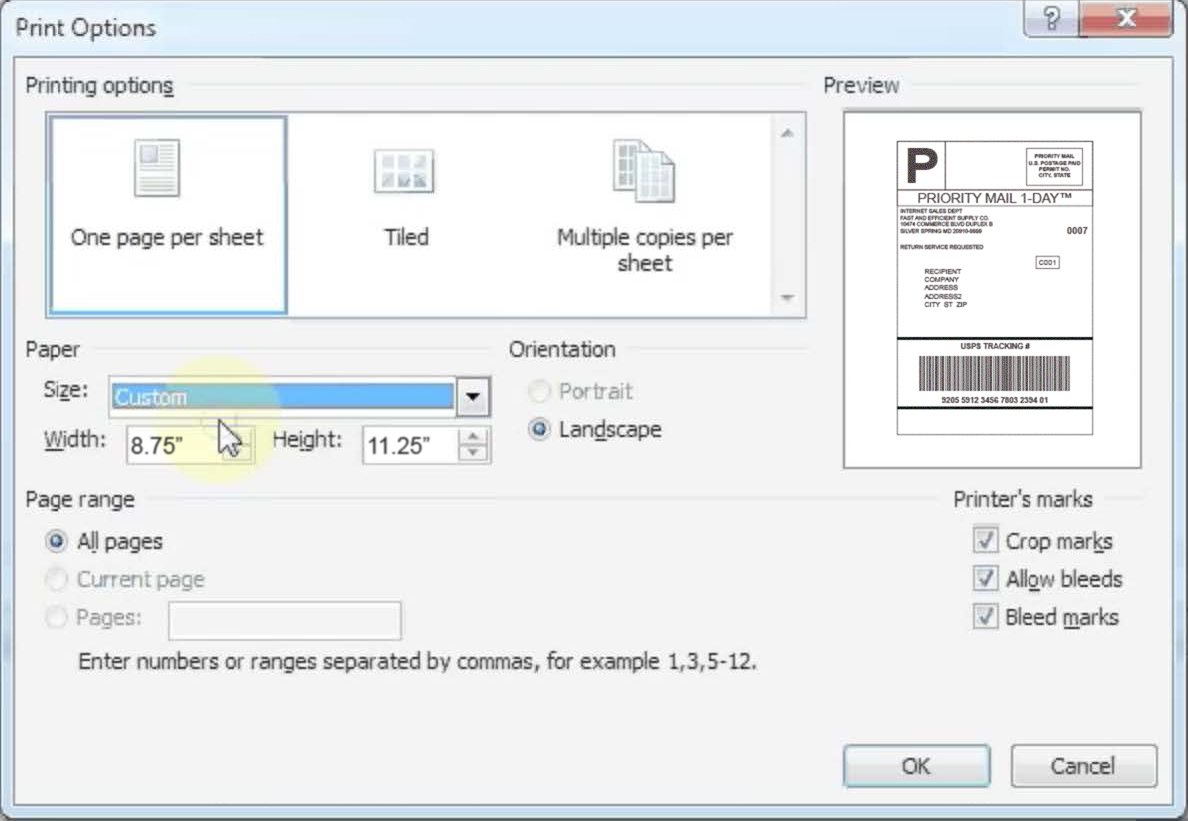
On the bottom-left of the Publish as PDF or XPS window (above), click Options. In the Publish Options window (right), select Commercial Print, then click Print Options in the bottom-left.
7. Complete the PDF Output
In the Print Options window (below), ensure that the output size is large enough to encompass your artwork, including bleed (Example, an 8.5"x11" letter with 0.125" bleed would need to be 8.75"x11.25"). Click OK, then click OK in the Publish Options window (above), then name your file and click Publish. Note: Bleed must be built into the artwork itself outside of the page edge in order to appear on the PDF.
8. Check your PDF
After outputting, give your PDF a visual check. Publisher can sometimes reflow text or downsize or drop images, so confirm that your PDF looks the same as the Publisher document before submitting it. For detailed instructions on how to check your PDF files, see our Artwork Specs.
